Search Results
369 results found with an empty search
- Why go the Extra Mile for Sushi?
In addition to the "Love" I put into our sushi rice, there is one particular ingredient I use when cooking rice. Water. Yes, not just plain water. It's a special spring water. This monthly ritual takes me on an hour-long drive along winding roads. My car is filled with plastic water jugs and bottles as I enjoy the spectacular scenery. My favorite time is in the evening when I can witness the beautiful orange sunset—a gift from nature. I feel excited as I pour the fresh spring water into my small personal water bottle and sip. Interestingly, the taste of "fresh" water differs from the one sitting in our kitchen for a few weeks. I often wonder what creates this difference. Is it the water's freshness? And what exactly does freshness in water mean? Could oxidization affect the water's freshness? Does it have something to do with the energy of the water? I don't have all the answers. All I know is that there is a discernible difference between fresh water and water that has lost its freshness. This spring water is exceptional. I use it to cook rice for our private dinners and catering services. You may have noticed that the rice tastes sweeter if you're lucky enough. The water also enhances the mildness of tea and coffee without any bitter aftertaste. Miso soup made with this water has a clean, smooth taste that brings out the ingredients' natural flavors. Many have asked why my sushi rice recipe calls for "mineral water." The reason is that the type of water you use can truly make a difference. Cooked rice consists of approximately 60% water, meaning more than half of the rice you consume is water. Naturally, you want to use the best-tasting water possible to cook your rice. In Japanese cuisine, a phrase embodies this concept of going the extra mile—adding that extra effort. It aligns with the English phrase "going the extra mile" and is a philosophical part of Japanese culture. The extra effort can be insignificant. It can be any effort, regardless of its size or impact. It's the thought behind it that counts. In sushi, these extra efforts can include curing horse mackerel with salt for five minutes, smoking salmon for sashimi, or placing pink peppercorns on Tai/Sea Bream nigiri, among others. These seemingly small steps can easily be overlooked, with our minds questioning their significance. However, contrary to our thinking, these small steps always make a difference. If I walk an extra mile, it may take me an additional twenty minutes. If I were to drive, it would only add a spare minute. Is it worth spending that extra time to witness the beautiful sunset and see the smiling, satisfied faces of those enjoying my sushi? I believe it is. Interested in tasting the sushi rice cooked with the fresh spring water I pick up? Request a quote. Happy to assist you in organizing your events.
- Homemade Recipe for Sushi: Spicy Shrimp & Spicy Salmon Temaki (Hand Roll) - Easy and Delicious!
It is the easiest and delicious Sushi almost anyone can make at home. COOKING TIME Total: 40 - 50 minutes Sushi Rice: 30 - 40 minutes Prep (Spicy Shrimp and Salmon): 5 - 10 minutes Rolling: 1-2 minutes When it comes to enjoying sushi at home, most Japanese people opt for a Temaki dinner. It's a quick, delicious, and satisfying way to savor sushi in the comfort of your own home. The best part? You don't need advanced sushi skills like making nigiri rolls. You must prepare sushi rice, cut up some vegetables, and slice the fish. In Japan, there are pre-packaged "sashimi plates" available at supermarkets. Simply plate the sashimi and let everyone create their own Temaki hand rolls. Think of it as a taco party at home - make your taco! It's fun, simple, and delicious. There's no need to make fancy Rainbow rolls (unless you want to impress your family and friends) or spend time making various rolls and nigiri. Temaki dinner offers a family-style sushi experience at its best. One of the significant advantages of a Temaki dinner is that you can offer plenty of vegetarian options and cooked fish like shrimp, tuna, and salmon. Canned tuna is a popular choice for Temaki in Japan, often called Lettuce Maki, Salad Maki, or Sea Chicken (chicken of the sea) Maki. It's similar to a tuna sandwich at Subway - canned tuna, mayonnaise, and lettuce. You can also add pickles or chili peppers for extra flavor. Another option is to skip the nori and use lettuce to wrap the sushi rice and tuna salad. You're in for a delightful surprise! TIPS Make, Eat, Repeat Temaki hand rolls are meant to be eaten right away. If you let them sit on a plate, the nori will become soggy and chewy, making it hard to bite off. Hot Sauce, Mayo and Sesame Oil is the basic formula The basic formula for creating the spicy flavors in your Spicy Shrimp and Salmon is hot sauce, mayo, and sesame oil. Sriracha is a popular choice, but you can use almost any hot sauce you like, such as Tapatio or Tabasco. Substitute sesame oil with olive oil for a different taste that pairs well with shrimp and salmon. INGREDIENTS (for two hand rolls): 60 - 90g (2 -3 oz.) Sushi Rice 2 Nori Seaweed, half sheet Spicy Shrimp 2-3pc Shrimp (21-26 size), Poached 1 -2 pcs Avocado, sliced ½ inch thick 5 g (1 tsp) Masago or Tobiko Fish Egg 5 g (1 tsp) Cilantro, Chopped (substitute with Green Onion) 30 g (2 tbsp) Sriracha 30 g (2 tbsp) Mayo 5 g (1 tsp) Sesame Oil (substitute with Olive Oil) Spicy Salmon 1 -2 pcs Avocado, sliced ½ inch thick 1 -2 pcs Avocado, sliced ½ inch thick 5 g (1 tsp) Masago or Tobiko Fish Egg 5 g (1 tsp) Cilantro, Chopped (substitute with Green Onion) 30 g (2 tbsp) Sriracha 30 g (2 tbsp) Mayo 5 g (1 tsp) Sesame Oil (substitute with Olive Oil) TOOLS Cutting Board Spoon Mixing Bowl INSTRUCTIONS: (making Spicy Shrimp, steps 2 - 3) Make Sushi Rice (follow this recipe). Chop Shrimp, Salmon and Cilantro. In a bowl, mix Chopped Shrimp, Cilantro, Masago, Sriracha, Mayo and Sesame Oil. Mix Spicy Salmon the same way. Hold Half Sheet Nori on the left hand, rough side facing up, placing the thumb on top. Wet your right hand. Grab sushi rice, golf ball size, approximately 30 - 50g (1 - 1.5 oz.) Place the Sushi on the top left corner of Nori. Using your right palm, apply pressure, spread the sushi rice diagonally about 30 degrees. Using a spoon (helps keep your hand clean), place Spicy Shrimp on sushi rice. Then Avocado on top. Pick up the bottom left corner with the right thumb and index finger, roll it up, diagonally about 70 degrees all the way to the top of Nori. Grab the “thick” rolled part (not the right edge of the Nori), keep rolling clockwise until it is all rolled up. Aim for Ice Cream Cone shape. Dip into soy sauce and eat right away before Nori becomes soggy. (Hand Roll sequence, steps 4 - 11) Public Online Sushi Making Class with Sushi kit includes Fresh Fish Sing up for our online Sushi Making Class and in-person sushi class in San Francisco. Our sushi kit has fresh fish and is available for overnight shipping to all 50 US states. For a private and Team Building event inquiry, send us an email.
- Homemade Recipe for Sushi: Everything Chumaki (Medium Seaweed Out Roll with Any Fish You Like, 4pc)
Compared to the traditional Hosomaki, which is a thin seaweed nori out roll, Chumaki offers a larger canvas to hold a variety of ingredients. The vertical rolling technique of Chumaki allows for the inclusion of not just fish but also cooked items like egg custard, canned tuna with mayo, beef, chicken, and vegetables such as spinach and shiitake mushrooms. In both the US and Japan, popular variations of Chumaki include Shrimp Tempura and Soft Shell Crab Tempura rolls. The Everything Roll, as I like to call it, is a creation that most sushi chefs have in their repertoire. At the end of the night, there are often small pieces of fish left at the sushi bar that may not meet the requirements for Nigiri or Sashimi. These leftover fish pieces, such as lean and tough tail parts or those with excess tendons, are perfect for the Everything Roll. After an online class, I crafted this roll using leftover pieces of Yellowfin Tuna, Steelhead/Ocean Trout, and Kanpachi. However, feel free to use any fish you have available. The combination possibilities are virtually limitless. Let your imagination run wild and create a roll with your favorite flavors! TIPS 1. Embrace the Creaminess of Avocado: Adding avocado to your Chumaki is always a fantastic idea. It imparts a luscious, fatty flavor that pairs beautifully with the fish. The only exception would be when using the rich belly part of the fish, as the avocado may be redundant. 2. Elevate Your Nori Out Rolls with Wasabi: Consider incorporating wasabi into the sushi rice while rolling for Nori Out Rolls. This addition adds an extra layer of flavor and complements the overall taste of the roll. 3. Opt for Affordable Tuna Pieces: Choose less expensive tuna pieces or tails instead of pricier Tuna Saku blocks. This way, you can enjoy delicious sushi without breaking the bank. Ingredients (for one roll): 1/4 cup (200g) Sushi Rice 1 Nori Seaweed, half sheet 30 - 50 g Assortment of Sushi Grade Fish 2 -3 pcs Avocado, sliced ½ inch thick Optional 4 - 6 Cucumber, Julienned Tolls: Cutting Board Knife Makisu, Sushi Rolling Mat Instructions: (How to spread sushi rice on Nori for Chumaki, steps 2 - 11) 1. Make Sushi Rice using this recipe. 2. Place the half sheet of nori horizontally, with the rough side facing up. 3. Wet your hands. 4. Place approximately half the rice used in an inside-out roll (about 200g) on the nori, leaving the top 1/8 inch/3mm blank. 5. Apply gentle pressure to spread the sushi rice horizontally using the bottom part of your left palm. 6. With your right hand, create a "U" shape and guide the sushi rice to cover the top half to 2/3 of the nori. 7. Rhythmically turn your left hand three times, ensuring the top portion of the nori is covered with rice, leaving a ½ inch/1cm gap on the left side. 8. Clean your hands with a wet towel, then lightly wet your fingers. 9. Using your fingertips, apply pressure while leaving the proper ½ inch/1cm blank. 10. Continue spreading the rice, leaving a 1/8 inch/3mm gap on the left and bottom edges. 11. Rotate the nori 90 degrees counterclockwise. 12. Place your desired filling below the center of the nori. 13. Lift the bottom edge of the nori and roll from the bottom up, ensuring a tight seal with your fingers. 14. Place a sushi rolling mat (Makisu) over the roll and press firmly to seal it even more. 15. Cut the roll into four equal pieces. 16. Plate and serve your delicious Everything Chumaki roll. (steps 12 - 16) Sing up for our online sushi-making class and in-person sushi class in San Francisco. Our sushi kit is available to ship to all 50 US states. For a private and team-building event inquiry, send us an email.
- Homemade Recipe for Sushi: Ebi Mayo Temaki (Shrimp Mayo Hand Roll)
COOKING TIME Cooking Time: 35 - 40 minutes Sushi Rice: 30 - 40 minutes Rolling: 1-2 minutes For those who think Sushi is about raw fish, please think again. Sushi means Seasoned Rice with Ingredients. The “Ingredients” can be vegetables, meats like Beef and Chicken, and of course, can be fish. Fish happens to be the most popular ingredient. By the way, the ingredients for Sushi is called Neta in Japanese. I’ve come across numerous folks who were not so fond of Sushi. Their idea of Sushi was raw fish. “Would you like to try making chicken sushi or cooked seafood sushi?” I ask one participant during the sushi class. “No thanks. I don’t eat raw fish.” It’s interesting to note how our mind works once we set the idea to settle in. Whether it is correct information or not, once we believe that is what it is, it’s hard to change. It is certainly almost impossible for someone else to change that belief. This is the reason why I keep writing these recipes and remind everyone that, always check what you believe. You will find out and be surprised most of what you believe to be true, is not what you think it is. When it comes to sushi, many people associate it solely with raw fish. However, sushi is much more than that. Sushi refers to Seasoned Rice with Ingredients, which can include vegetables, meats like Beef and Chicken, and fish. While fish is a popular choice, it's essential to broaden our understanding of sushi. During sushi classes, I often encounter individuals who are hesitant about sushi because they believe it consists only of raw fish. To challenge this perception, I invite participants to explore alternative sushi options, such as chicken or cooked seafood. We can expand their culinary horizons by introducing them to new flavors and ingredients. That brings us to Ebi Mayo, a beloved sushi roll in Japan. It features lettuce-wrapped shrimp with mayonnaise—a combination that perfectly embodies the Japanese love for mayo (especially Kewpie!). Imagine the delightful blend of flavors when you wrap it with lettuce and sushi rice, creating a Shrimp Mayo Rice Salad. The taste is simply irresistible. Now, you might wonder if this dish is truly authentic. I encourage you to question your belief system. Yes, Ebi Mayo is an original modern Japanese sushi creation. If you ask any Japanese person about "Lettuce Maki," they will confirm its existence and express their fondness for it. Here are some tips to enhance your Ebi Mayo experience: 1. Use cooked/poached shrimp: If raw shrimp is unavailable, cooked frozen shrimp can be used. Alternatively, thaw frozen uncooked shrimp, cook it, and incorporate it into the roll. 2. Lettuce Roll: In Japan, lettuce rolls are also famous. You can substitute lettuce for nori to create a refreshing and crisp alternative. 3. Add a Spicy Twist: Mix in some hot sauce when combining the shrimp with mayonnaise for an extra kick of flavor. 4. No Sushi Rice? No Problem: If you need more time, plain rice can be used as a substitute for sushi rice. Ready to make your own Ebi Mayo Temaki? Here's what you'll need: INGREDIENTS (for one roll): 30 - 50g Sushi Rice 1 Nori Seaweed, half sheet 2pc (10g each) Poached Shrimp 20 g Mayonnaise 1 Green Leaf (or any kind) Lettuce 2-3 English Cucumber, Julienned Optional 1 - 2 pcs Avocado, sliced ½ inch thick TOOLS: Cutting Board Knife INSTRUCTIONS: 1. Make Sushi Rice using this recipe. 2. Chop the poached shrimp into small dice. 3. In a bowl, mix the chopped shrimp with mayonnaise. 4. Hold the half sheet of Nori in your left hand, with the rough side facing up and your thumb on top. 5. Wet your right hand. 6. Grab a golf ball-sized portion of sushi rice, approximately 30 - 50g. 7. Place the sushi rice on the top left corner of the Nori. 8. Using your right palm, apply pressure to spread the sushi rice diagonally at a 30-degree angle. 9. Add lettuce, followed by Ebi Mayo and julienned cucumber. 10. Pick up the bottom left corner with your right thumb and index finger, and roll it up diagonally about 70 degrees until you reach the top of the Nori. 11. Grasp the "thick" rolled part (not the right edge of the Nori) and continue moving clockwise until it is completely rolled up. 12. Dip the roll into soy sauce and enjoy it immediately to prevent the Nori from becoming soggy. Sing up for our online sushi making class and in-person sushi class in San Francisco. Our sushi kit is available to ship to all 50 US states. For a private and team building event inquiry, send us an email.
- 7 Essential Tips for Making Perfect Sushi (Expert Advice from a Sushi Chef)
1. Keep your hands moist when handling sushi rice To ensure the rice doesn't stick to your hands, moisten them with water (Te-Mizu) before touching the rice. This will help prevent any mishaps, as shown in the main picture of this article. 2. Avoid excessive moisture on your hands when working with sushi rice While moist hands are beneficial, be cautious not to make them too wet. Excess water can dampen the sushi rice, causing it to crumble when applied to Nori Seaweed or formed into nigiri. Strike a balance between wet and dry for optimal results. 3. Incorporate vinegar or lemon juice into your hand water Adding a touch of vinegar or lemon juice to your hand water can help break down the starch in the rice, making it easier to handle. 4. Minimize direct contact with sushi rice Although it may seem obvious, reducing direct contact with sushi rice will keep your hands cleaner. Strive for efficiency and use tools when possible. 5. Ensure your knife is sharpened correctly before starting to make sushi Sharp knives are indispensable for slicing rolls, vegetables, and fish with precision. If your knife lacks sharpness, consider investing in a reliable $30 Electric Knife Sharpener (affiliate link) available on Amazon. It works wonders, and I use it too. 6. Maintain sushi rice at body temperature (37°C or 98.6°F) Keep the rice at body temperature for the best flavor, especially in Nigiri sushi. Use a suitable container to maintain the desired temperature, utilize a rice cooker to keep it warm, or gently reheat sushi rice in the microwave if it becomes too cold. 7. Keep your cutting board clean and free of food residue A clean cutting board is crucial when preparing sushi. Any food debris on the board can interfere with the sushi-making process and may unintentionally adhere to your creations. By following these seven essential tips, you'll be well on your way to crafting perfect sushi like a seasoned chef. Breakthrough Sushi now offers online sushi-making class for team building, client appreciation, birthday, celebration and holiday event. For more information about our online sushi making class, email: info@breakthroughsushi.com
- Homemade Recipe for Sushi: Double Shrimp Roll (Inside Out, 8 pieces) - An Irresistible Delight
It is beyond yummy. COOKING TIME Total: 35 - 40 minutes Sushi Rice: 30 - 40 minutes Rolling: 5 minutes While this Double Shrimp Roll may not be considered a "traditional" or "authentic" sushi recipe in Japan, this “Special Roll” has gained popularity in the US and other parts of the world. Special rolls like the Rainbow Roll, Caterpillar Roll, and Alaskan Roll have become a common sight in many sushi restaurants. Inspired by the success of the Miola Rolla at the first restaurant I worked at, which featured spicy tuna or shrimp on top of a cucumber avocado roll, I created a particular roll combining Spicy Shrimp with Shrimp Tempura. Given the widespread love for shrimp, it seemed like a perfect choice. After preparing some samples and having the restaurant chefs and staff try them, the consensus was unanimous - "Delish!" Once the roll made its way onto the specials menu, it quickly became a customer favorite. TIPS Convenience of Shrimp Tempura Making shrimp tempura at home can be a daunting task. To simplify the process, you can use frozen shrimp tempura instead of making it from scratch. INGREDIENTS (for one roll): Roll 200g (1 cup) Sushi Rice 1 Nori Seaweed, half sheet 5 - 7g (1/4 oz) Sesame Seeds, Roasted (white or black) Spicy Shrimp 3 pcs (15g each) Cooked Shrimp (size 21/26) 30 g (1oz.) Sriracha 30 g (1oz.) Mayo 5 g (1/5 oz.) Sesame Oil (substitute with Olive Oil) 5 g (1/5 oz.) Masago or Tobiko Fish Egg Shrimp Tempura 2pcs Shrimp, (size 21/26) 1 egg 100 g (3 oz.) Flour 300cc (1.5 cups) water Rice Bran Oil (or Canola Oil) Sesame Oil TOOLS: Cutting Board Knife Large Spoon Makisu, Sushi Rolling Mat Plastic Wrap Small sheet pans (or plate) Small Bowl Whisk Frying pan Tong or Long Wood Cooking Chopsticks Bamboo stick INSTRUCTIONS: Cook Sushi Rice - follow this recipe. Prepare shrimp Remove the shell and cut the back side of the shrimp, discarding the vein. Score the inner part of the shrimp with a knife, cutting halfway into the meat. Place the shrimp on the cutting board and press firmly with your fingers to detach the tendon. It should make a breaking sound when pressed. Create a decorative tail by cutting the end part of the tail at a 45-degree angle. This enhances the appearance of the fried shrimp tail. Make Tempura Batter Create "egg water" by pouring 300cc (1.5 cups) of water into a small bowl, then adding the egg. The egg white will dissolve first, followed by the egg yolk. Strain 60g (2 oz) of flour into a bowl and add 60g (2 oz) of egg water (1:1 ratio of flour to egg water). In a frying pan, pour rice bran (or canola) oil and sesame oil to a depth of 3cm (1 ¼ inch). The ratio of rice bran oil to sesame oil should be 3:1. Frying Shrimp Heat the frying oil to 190°C (375°F). Test the temperature by dropping some tempura batter into the oil. If it hits the bottom and rises to the surface immediately, the oil is ready. Place flour in a sheet pan and coat the prepared shrimp with flour. Shake off the excess flour. Hold the tail and dip the shrimp into the tempura batter, then hold it for three to five seconds to remove the excess batter. Place the batter-coated shrimp into the oil and fry for one to two minutes until light yellow. Remove from the oil and let the shrimp sit on a paper towel to remove excess oil. Making an inside-out roll (How to spread rice for Inside Out Rolls, Step 2 - 12) Moisten the cutting board b wiping it with a wet towel. Place a half sheet of nori horizontally on the cutting board with the rough side facing up. Wet your hands with water. Take a tennis ball-sized amount of sushi rice and cover the entire surface of the nori with rice, starting from the top left corner and covering the top half first, then the bottom. Sprinkle sesame seeds over the rice. Flip the roll so that the rice is facing up and the nori side is down. Place two pieces of shrimp tempura and avocado in the center. Roll the sushi from the bottom up and place plastic wrap on top of the roll, using a bamboo mat to seal it. Remove the plastic wrap and place the spicy shrimp on top of the roll. Place the plastic wrap on top again, followed by the rolling mat. Cut the roll into eight pieces, keeping the plastic wrap on to prevent the spicy shrimp from falling off. Sprinkle sliced scallions. Plate and serve. (Double Shrimp Roll, Steps 8 - 14) Public Online Sushi Making Class with Sushi kit includes Fresh Fish Sing up for our online Sushi Making Class and in-person sushi class in San Francisco. Our sushi kit has fresh fish and is available for overnight shipping to all 50 US states. For a private and Team Building event inquiry, send us an email.
- Delicious Homemade Recipe for Sushi: Asparagus Tempura Roll
Discover the Magic of Fried Asparagus in Sushi COOKING TIME Total: 50 - 60 minutes Sushi Rice: 30 - 40 minutes Asparagus Tempura: 20 minutes Rolling: 1-2 minutes Here's a culinary truth: Sushi is not limited to raw fish. While fish is popular, sushi encompasses various ingredients, including vegetables. Take the cucumber avocado roll, for example. It's still sushi, showcasing the versatility and creativity of this culinary art form. Vegetarian sushi, such as the Oshinko (daikon pickles), Kanpyo (dried gourd shaving), and Kappa (cucumber) Roll, is highly celebrated in Japan. Adding avocado to sushi has taken the vegetarian sushi scene by storm in recent years. This brilliant move adds a creamy and rich element to the vegetable-based rolls, elevating their flavors. Avocado complements the ingredients perfectly, but striking the right balance is crucial. The avocado should enhance the flavors without overpowering them. Remember, each element is vital to the sushi's taste profile. Now, let's delve into the star of our recipe: Asparagus tempura. The main character in this roll is the crispy asparagus tempura, while the avocado takes on a supporting role. The avocado's purpose is to accentuate the flavors of the asparagus tempura, ensuring a harmonious combination. Striking the perfect balance is a personal choice, allowing you to adjust the avocado amount according to your preference. Fried food is universally loved, and tempura is no exception. When you incorporate tempura into a sushi roll, it tastes a whole new level of fantastic. Tempura is traditionally made with various vegetables such as carrots, shishito peppers, yam, potatoes, and shiitake mushrooms. While tempura sauce (soy sauce and dashi stock) is famous for enjoying tempura, teriyaki or eel sauce adds an excellent flavor profile when used in sushi rolls. If you find the process of making tempura overwhelming, don't worry. You can achieve a similar effect by coating the asparagus in breadcrumbs and baking it in the oven. Here are some helpful tips to elevate your asparagus tempura roll: 1.Tempura Batter Begin by making "egg water." Remember to pour the water into a bowl first, then add the egg. If you prefer a vegan option, skip the egg and use water instead. By the way, this is a recipe I learned from the Japanese tempura master, Mr. Kond. 2. Cold Water vs. Normal Water: Contrary to common belief, there's no need to use ice-cold water in the tempura batter. According to a Michelin-starred Japanese tempura chef, using ordinary water is sufficient and prevents extreme temperature differences between the batter and the oil, making frying easier. 3. Check the Oil Temperature: Drop a small amount of tempura batter into the oil to ensure the oil is at the right temperature. If it floats back to the surface after hitting the bottom of the pan, the oil is ready for frying. Ready to create your Asparagus Tempura Roll? Here's what you'll need: INGREDIENTS (for one roll): Roll ½ (200g) cup Sushi Rice 1 Nori Seaweed, half sheet 3 - 5 g Wasabi Teriyaki Sauce Asparagus Tempura 2 - 6 pcs Asparagus 1 egg 3 oz. (100 g) Flour 1.5 cups (360 cc) water Rice Bran Oil (or Canola Oil) Sesame Oil TOOLS: Cutting Board Knife Large Spoon Makisu, Sushi Rolling Mat Small sheet pans (or plate) Small Bowl Whisk Frying pan Tong or Long Wood Cooking Chopsticks INSTRUCTIONS: Asparagus Tempura Make "egg water." Pour 1.5 cups of water into a small bowl, then add the egg. This order ensures the egg white dissolves appropriately. If you add the egg first, it may result in undissolved egg white. Strain 2 oz. of flour into a bowl and add two oz. Of egg water (egg water: flour ratio = 1:1). In a frying pan, pour rice bran, canola, and sesame oil around 1-1 ¼ inches deep. The ratio of rice bran oil to sesame oil is 1:1. Drop some tempura batter into the oil to test the temperature. The oil is ready if it floats back to the surface after hitting the bottom. Coat the asparagus in flour from a sheet pan, then dip it into the tempura batter. Remove any excess batter by holding it for three to five seconds. Place the battered asparagus into the oil at 375°F (190°C). Fry for one to two minutes until it turns light yellow. Remove the asparagus from the oil and let it rest on a paper towel. Make Sushi Rice (follow this recipe). 1. Moisten the cutting board with a wet towel. 2. Place a half sheet of nori horizontally, with the rough side facing up. 3. Wet your hands. 4. Grab a portion of sushi rice, approximately half the amount needed for an inside-out roll (around 200g). 5. Leave the top 1/8 inch (3mm) blank. 6. Using the bottom of your left palm, apply pressure and spread the sushi rice horizontally. 7. With your right hand in a "U" shape, guide the sushi rice to cover the top half to 2/3 of the nori. 8. Turn your left hand three times rhythmically to cover the top portion of the nori with rice, leaving ½ inch (1cm) blank. 9. Clean your hands with a wet towel and dip your fingers in water. 10. Using your fingertips, apply pressure and leave the suitable ½ inch (1cm) blank. 11. Continue spreading the rice, leaving 1/8 inch (3mm) at the left and bottom edges. 12. Turn the nori 90 degrees counterclockwise. 13. Place some wasabi just below the center of the nori using your index finger. 14. Add the asparagus tempura and avocado on top of the rice. 15. Roll the sushi from the bottom up, firmly sealing it with your fingers. Place a sushi rolling mat (makisu) over the roll to further secure it. 16. Start by cutting the center of the roll first and then dividing it into four pieces. 17. Plate the sushi and pour some teriyaki sauce over it. Sing up for our online sushi-making class and in-person sushi class in San Francisco. Our sushi kit is available to ship to all 50 US states. For a private and team-building event inquiry, send us an email.
- Unforgettable Sushi Catering: A Culinary Journey for Your Special Occasions
As Breakthrough Sushi celebrates our 10th anniversary and my 50th birthday, I find myself preparing for a momentous occasion with 100 esteemed guests. The careful selection of fish and meticulous attention to detail are the essence of this extraordinary gathering. Allow me to share the exceptional fish order and culinary preparations that will make this event a true delight. Fish Order: To ensure an unforgettable sushi experience, my fish order consists of the finest ingredients carefully curated for their quality and taste: - 25 lbs. Yellowfin Tuna - 3 lbs. Sea Bream Fillet - 4 lbs. Albacore Loin - 5 lbs. Ocean Trout - 5 lbs. Kanpachi Fillet - 3 lbs. Dungeness Crab Meat - 7 lbs. Black Cod - 4 lbs. King Ora Salmon - 2 lbs. White Shrimp - 3 lbs. Scallops - Salmon Roe and White Sturgeon Caviar Preparation: In our prep kitchen, I transform these exquisite ingredients into culinary masterpieces (I hope). With 100 cups of cooked rice ready to be mixed with our house-made sushi vinegar, the foundation for delectable sushi is set. As the clock strikes 9 am, I dive into the fish preparation, meticulously cutting vegetables, packing the van, and embarking on the journey to Palo Alto, where the party awaits. Sushi Creations: Every detail counts when it comes to crafting sensational sushi. Allow me to highlight a few techniques that elevate the flavors of our creations: 1.Steelhead (aka: Ocean Trout) and Salmon: Employing a Japanese curing technique known as "shime," I soak the fish in sugar, rinse it with water, and then cure it with salt. This process imparts a sweet taste to the salmon and adds a delightful aroma when infused with hickory smoke overnight. 2. Spicy Tuna: Attention to detail is paramount when preparing this beloved dish. I scrape tuna pieces with a spoon, ensuring a chunky texture that preserves the flavor. Mixing the freshly ground tuna with Sriracha, mayo, and sesame oil, I allow the flavors to meld and intensify over a couple of hours. 3. Baked Black Cod Miso: While seemingly ordinary, our Baked Black Cod Miso is a true crowd-pleaser. Marinated in a miso-orange juice mixture enhanced with Shio Koji, agave, and mirin, the cod reaches its full potential after an overnight marinade. Baked at a low temperature of 275°F/135°C, it becomes a delicate and savory delight. 4. Dungeness Crab: With its exceptional taste, It requires only a squeeze of lemon to elevate its savory notes. This extraordinary crabmeat is a culinary treasure, satisfying even the most discerning palates. 5. Sea Bream: The Konbu curing technique stands out for Sea Bream. The umami from the konbu permeates the delicate fish by wrapping the skinned filet with hydrated konbu and allowing it to infuse overnight. A small thin slice, fresh lemon juice, Himalayan salt, pink peppercorn, and a drizzle of White Truffle oil create a divine flavor symphony. Our client favorite. 6. Konbu Wrap Experimentation: Embracing innovation, I explore the art of wrapping various fish with Konbu. Each experiment unveils unique flavors, offering a journey of surprises and discoveries. 7. White Shrimp: Exceptional in its sustainability and pathogen-free nature, raw white shrimp takes center stage. Preparing it for sushi requires meticulous steps such as piercing the back, blanching it in boiling water, and cooling it in ice water. This careful preparation ensures the clean, sweet taste of the shrimp shines through. 8. Scallops: Though Hokkaido scallops are renowned, the Monterey Fish Market offers an extraordinary alternative. These scallops, known for their exceptional sweetness and creaminess, require minimal embellishment. A squeeze of lemon and a sprinkle of sea salt or Himalayan salt enhance their natural flavors, creating a culinary wonder in every bite. Thinking of planning your next special party? Email us at info@breakthroughsushi.com. We are cut above the rest. We serve more than fish. It's the memory we create.
- 6 Behaviors You Should Avoid When Eating at a Sushi Bar
1. Avoid Overindulging in Gari (pickled ginger) While pickled ginger is usually complimentary at sushi bars, it's important to remember that it's not an endless breadstick like at Olive Garden. The same applies to Wasabi and soy sauce. Practice moderation when using these condiments. 2. Don't Drown Your Sushi in Soy Sauce Soy sauce is meant to be used sparingly, like a dipping sauce, to enhance the flavors of sushi and sashimi. Using too much soy sauce can overpower the delicate taste of sushi rice, fish, and vegetables. Use it sparingly. If you're looking for an alternative to soy sauce, try using salt and lemon juice or consult the sushi chef for recommendations. 3. Avoid Mixing Wasabi with Soy Sauce This is especially important if the sushi bar serves real, fresh Wasabi. Mixing wasabi with soy sauce can diminish the unique aroma of fresh Wasabi. If your sushi chef sees you creating a green soy sauce mixture, they may not appreciate it. If the Wasabi provided is not new, it's acceptable to dissolve a small amount in soy sauce, but be mindful of using only a little. 4. Refrain from Asking, "What's Fresh Today?" The fish must be fresh enough for raw consumption at a sushi bar. Asking about the freshness of the fish can sometimes come across as insulting to the chef. Additionally, not all fish tastes best when incredibly fresh. Some fish, like Salmon, Tuna, and Tai/Sea Bream, require time to develop flavor, typically five to fourteen days after being caught. Instead of asking about freshness, consider asking the chef for their recommendations. 5. Understand that Wasabi is a Condiment, Not a Sinus Cleanser It's worth clarifying that Wasabi is not for sinus cleansing purposes; it is a condiment used to enhance the flavor of sushi. 6. Avoid Trying to Impress Your Date with Your Sushi Knowledge This advice is specifically for men attempting to impress their date. As male sushi chefs, we are well aware of your intentions. We can hear more conversations at the sushi bar than you might think. We spend extensive time working with fish and making sushi, so we possess more knowledge about sushi and fish than you may pretend to have. While it's great to be interested in sushi, it's better to ask your sushi chef questions and let them do the talking. This way, you have a better chance of impressing your date. Instead of trying to showcase your expertise, engage with your sushi chef and show genuine interest in the culinary experience.
- Homemade Recipe for Sushi: Simple and Delicious Salmon Hosomaki (Thin Nori/Seaweed Out Roll, 6pc)
COOKING TIME Total: 35 - 40 minutes Sushi Rice: 30 - 40 minutes Rolling: 5 minutes If you have yet to try Hosomaki, I highly recommend doing so. If you have yet to try Hosomaki, I highly recommend doing so. While enjoying sushi outside of Japan, you may have encountered more Inside (Rice) Out Rolls than Nori Out Rolls. "Traditional" Japanese Sushi Rolls are Nori Out, meaning the rice is on the outside and the filling is inside. As much as I appreciate both types, the issue with Inside Out Rolls is that the rice tends to overpower the flavors of the fish and vegetables. It becomes challenging to discern the subtle taste of the fish amid the vinegar and sugar in the Sushi Rice. This is why I prefer Nori Out Rolls, especially when I want to savor and truly enjoy the fish's flavor. Among Nori Out Rolls, there are mainly three types: Futomaki, a thick roll using at least one full sheet of nori; Chumaki, a medium-sized roll using half or full sheet of nori; and lastly, Hosomaki, a thin roll using a half sheet of nori. Personally, Hosomaki strikes the perfect balance between nori, sushi rice, and filling. My favorite to make and eat is Tekka, Tuna Hosomaki, and Salmon Hosomaki comes in as a close second. You can use Smoked Salmon as a substitute if you need help finding Sushi Grade Salmon. Alternatively, if you want to smoke the Sushi Salmon, here's a simple recipe. TIPS Avoid overfilling Hosomaki can be challenging, as it's easy to overfill with Sushi Rice and other ingredients. The trick is to be mindful and use fewer ingredients than necessary. Use Fresh Wasabi Some wasabi farms in Oregon and California, like the Half Moon Bay Wasabi Company, can ship fresh wasabi to the US. If fresh wasabi is unavailable, you can use the frozen kind. INGREDIENTS (for one roll): 100g (1/2) cup Sushi Rice 1 Nori Seaweed, half sheet 30 - 40g Sushi Grade Salmon strips TOOLS: Cutting Board Knife Makisu, Sushi Rolling Mat INSTRUCTIONS: (How to spread rice for Hosomaki, Step 3 - 11) 1. Make Sushi rice (follow this recipe). 2. Cut the Salmon into thin strips. 3. Place the nori, shiny side down, to make Nori Out Hosomaki/Thin roll. 4. Wet your hands with water. 5. Grab sushi rice, half the amount needed for an inside-out roll, approximately 100g. 6. Leave the top ½ inch/1cm of the nori blank. 7. Apply pressure and spread the sushi rice horizontally using the bottom part of your left palm. 8. Make a "U" shape to guide the sushi rice to cover the top half to 2/3 of the nori with your right hand. 8. Rhythmically turn your left hand three times to cover the top portion of the nori with rice. 9. Clean your hands with a wet towel, then dip your fingers in the water. 10. Apply pressure and spread the rice using your fingertips, leaving 1/8 inch/3mm of space at the left, right, and bottom edges. 11. Using your left index finger, apply wasabi in the center of the rice. 12. Lift the nori and place the Makisu underneath. 13. Place the Salmon strips or avocado in the center. 14. Roll - Pick up the bottom part of the Makisu and seal the roll by placing the bottom edge against the top end of the sushi rice. 15. Press to seal. (Salmon Hosomaki, Steps 12 - 15) Sing up for our online sushi making class and in-person sushi class in San Francisco. Our sushi kit is available to ship to all 50 US states. For a private and team building event inquiry, send us an email.
- Homemade Recipe for Sushi: Teriyaki Chicken Roll! (Nori Seaweed Out Chumaki Medium Roll, 4pc)
Think of it as Nori wrapped Chicken Rice Salad. COOKING TIME Total: 40 - 50 minutes Sushi Rice: 30 - 40 minutes Teriyaki Chicken: 35 - 40 minutes Rolling: 5 minutes If you are still thinking of a Sushi Roll must have fish fillings to be called Sushi, then it’s time for you to start the new understating about Sushi. A Sushi Roll with cooked fish like Tuna is a common and popular item in Japan, as well as in many parts of the world. There is even a Caramel Banana Sushi in Japan at one of the biggest sushi restaurant chains, Kura Sushi. When I started my sushi class company in San Francisco, the first sushi chef to help me get things “rolling” was an open-minded Caucasian chef named Adam. He experimented with different fillings for the roll. “French Fries Roll is surprisingly good,” Adam told me. “I served during a happy hour at a bar and was quite popular.” I can see French Fries would make a nice roll. If the idea of ketchup or mayo on rice sounds odd to you, think of risotto - cheese or tomato sauce over rice. Because sushi rice is seasoned with rice vinegar, sugar and salt, it’s like rice salad. Sushi vinegar is basically an oil-free salad dressing. So, if you can think of anything that goes into your salad, or rice salad, that ingredient will also go well with a sushi roll: Shrimp Louie Salad, Tuna Salad and yes, Cesar Salad with Grilled Chicken. Why not roll that Teriyaki Chicken because that Teriyaki Sauce is so yummy that it goes well with (almost) anything. Yes, almost anything can go well with sushi. Keep your imagination wild. Give a try and roll whatever that fancies you. TIPS Cook Teriyaki Chicken While Rice is being cooked Set the rice to cook (hopefully in a rice cooker) and then, start prep and cook chicken. By the time you are done with Sushi Rice, so should your Teriyaki Chicken. INGREDIENTS (for one roll): 200g (1cup) Sushi Rice 1 Nori Seaweed, half sheet 50 - 70 g Teriyaki Chicken 1 Green Leaf Lettuce 2 - 3pc Cilantro Stems Optional Mayonnaise 2 -3 pcs Avocado, sliced ½ inch thick TOOLS: Cutting Board Knife Makisu, Sushi Rolling Mat INSTRUCTIONS: (How to spread rice for Chumaki, Nori Out Medium Roll, Step 3 - 13) Make Sushi Rice (follow this recipe). Make Teriyaki Chicken (follow this recipe). Wipe the cutting board with a wet towel to moisten Place half sheet nori horizontally, rough side facing up Wet your hands. Grab sushi rice, half the amount of inside out roll, approximately 200g Leave top 1/8 inch/3mm blank. Using the bottom part of your left palm, apply pressure, spread the sushi rice horizontally. With your right hand, making a “U” shape, guide the sushi rice so that it covers the top half to 2/3 of nori Rhythmically, turn your left hand three times to cover the top portion of the nori with rice, leaving ½ inch/1cm left blank Clean your hands with the wet towel, dip your fingers in the water Using fingertips, apply the pressure, Leave right ½ inch/1cm blank Continue spreading the rice leaving 1/8 inch/ 3mm left and bottom edge. Turn the Nori 90 degrees counterclockwise. Cut the chicken into small strips, matching the length of Nori. Place the green leaf lettuce first, then cucumber, cilantro. Pick up the bottom edge of Nori, roll from the bottom up Seal tightly with the fingers, place Makisu and seal the roll tighter Cut into four pieces. Plate and pour Teriyaki Sauce. (Teriyaki Chicken Roll, Steps 14 - 19) Sing up for our online sushi making class and in-person sushi class in San Francisco. Our sushi kit is available to ship to all 50 US states. For a private and team building event inquiry, send us an email.
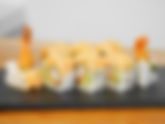
- Red Dragon Roll
While many Dragon Roll recipes call for Unagi, Fresh Water Eel, most of the Red Dragon Rolls are missing Unagi. Another ingredient missing from Red Dragon Roll is the eel sauce as it has spicy tuna on top. If you like that sweet BBQ eel sauce on your roll, sure, it’s perfectly Ok to pour some of that. However, my recommendation is to use mayo or cream based cause for spicy tuna, perhaps simple ponzu or citrus sauce just might do it. Red Dragon roll will require the making of shrimp tempura, so it will take more time to prep and make. If making shrimp tempura is too much of a task, you can substitute it with pre-fried shrimp tempura found in a frozen food section at your supermarket. Just microwave or in an oven for a few minutes, and you will have a tempura shrimp ready to be rolled! TIPS Scrape tuna Never chop your tuna. Chopping tuna with the knife will make it taste bland. I don’t know why (meaning the scientific reason behind this), but tuna tastes good when it’s chunky. This is the reason why tuna sashimi is normally cut thicker than other fish. When making spicy tuna, make sure to scrape with a spoon. Tempura Batter Make “egg water” first. When you make egg water, make sure to pour water in a bowl first, then add the egg. If place the egg in the bowl, and add water, it will produce undissolved egg white. Cold water vs. Normal water? Many recipes call for ice cold water or add water to the tempura batter. The verdict, according to the Michelin stared Japanese tempura chef, there is no need to use ice cold water. “It will only make it difficult to fry because it will create more temperature difference between the batter and the oil.” Ingredients (for one roll): Roll ½ (200g) cup Sushi Rice 1 Nori Seaweed, half sheet 1/4 oz. (7g) Sesame Seeds, Roasted (white or black) Spicy Tuna ¼ lbs. (100g) Tuna Pieces, Sushi Grade 1 tbl (15ml.) Sriracha (or hot sauce of your choice) 1 tbl (15ml.) Mayo Dash Sesame Oil (substitute with Olive Oil) ¼ oz. (7g) Scallions, Thinly cut Shrimp Tempura 2pcs Shrimp, 21/26 size 1 egg 3 oz. (100 g) Flour 1.5 cups (360 cc) water Rice Bran Oil (or Canola Oil) Sesame Oil Tolls: Cutting Board Knife Large Spoon Makisu, Sushi Rolling Mat Plastic Wrap Small sheet pans (or plate) Small Bowl Whisk Frying pan Tong or Long Wood Cooking Chopsticks Toothpick Instructions: Make Sushi rice (follow this recipe) Spicy tuna Scrape tuna with a spoon. Never chop the tuna with your knife, as chopping will the texture mushy and make the tuna flavor go away. Mix scraped tuna with Sriracha, Mayo, Sesame Oil and chopping scallions in a bowl. Shrimp Tempura Make “egg water.” In a small bowl, pour 1.5 cups of water first, then egg. Egg white is water soluble, so when you place it egg in the water, egg white will dissolve first, then egg yolk. When you beat egg in a bowl first and then add water, some of the egg white will sit at the bottom of the bowl, undissolved. Strain 2 oz. of flour into a bowl, add 2 oz. egg water (egg water: flour = 1:1) In a frying pan, pour rice bran (or canola) oil and Sesame Oil to 1 – 1 ¼ inch deep. The ratio of Rice Bran Oil: Sesame Oil is 1:1. Prepare shrimp Remove the shell. Cut the back side of the shrimp, remove and discard the vein. Score the inner part of the shrimp with a knife by cutting halfway into the meat. Place the shrimp on the cutting board, press firmly with your fingers to detach the tendon. When you press the shrimp, it should make a breaking sound. Frying Shrimp Place flour in a sheet pan. Place prepared shrimp in a sheet pan, coat with flour. Life up the shrimp, shake to remove the excess flour. Hold the tail and dip the shrimp into tempura batter. Life up, hold it for three to five seconds to remove the excess batter. Place the batter coated shrimp into the oil 375F (190C). Fry for one to two minutes until light yellow. Remove from the oil, let the shrimp sit on paper towel. Make A Roll Place nori, shiny side down Wet your hands with water Grab a tennis-ball-size amount of sushi rice Cover the entire nori surface with rice (place rice on the top left corner, cover top half first, then bottom) Sprinkle sesame seeds Flip it over so that rice is facing up, nori side down Place two pieces of shrimp tempura and avocado in the center Roll from the bottom up, place plastic wrap on top of a roll (rice) use a bamboo mat to seal. Remove the plastic, place spicy tuna on top of the roll. Place the plastic one more time, followed by the rolling mat. Cut into 8 pcs (keep doing halves) with plastic still on (helps to keep the spicy tuna from falling off) Sprinkle slices scallions. Plate and serve Sing up for our online sushi making class and in-person sushi class in San Francisco. Our sushi kit is available to ship to all 50 US states. For a private and team building event inquiry, send us an email.