Search Results
369 results found with an empty search
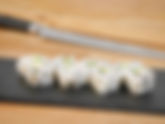
- Make sushi at home recipe: California Roll with Real Crabmeat
COOKING TIME Total: 35 - 40 minutes Sushi Rice: 30 - 40 minutes Rolling: 5 minutes When I founded Breakthrough Sushi in 2012, my goal was to offer authentic Sushi Classes that showcased the true essence of sushi-making. One of the first things that caught my wife’s attention was using imitation crabmeat (Kani Kama) in California Rolls. It led me to question why we couldn't use real crabmeat, especially since San Francisco is abundant with Dungeness Crab. My wife's curiosity mirrored my own, and it sparked a journey to create a Dungeness Crab California Roll that would elevate the flavors to new heights. The result was magnificent - the rich taste of Dungeness Crab infused with traditional sushi elements made for an unforgettable sushi experience. While some may prefer Kani Kama due to its affordability and extended shelf life, I highly recommend using sustainable crab meat like Blue Crab or Dungeness Crab. The exquisite taste and fresh flavors are genuinely worth it. However, I understand the convenience of using imitation crab for its wide availability and cost-effectiveness. Kani Kama, the imitation crab, is derived from a Japanese fish cake called Kamaboko. It is made from ground white fish (surimi in Japanese), egg white, potato starch, and sometimes crab essence. Available in stick, flake, or shredded form, Kani Kama was created in Japan during the 1970s and is considered one of the significant post-WWII food innovations, alongside instant ramen and retort curry. Pro Tips for the Perfect California Roll: Variety in Texture and Taste: Kani Kama comes in various forms - sticks, flakes, and shredded. Each offers a different texture and taste, so feel free to experiment and find your preference. Add Some Mayo Magic: Enhance the flavor by adding mayo or pre-mixing it with Kani Kama, which can add a delightful creaminess to the roll. INGREDIENTS (for one roll): 200g Sushi Rice 1 Nori Seaweed, half sheet 2 Sticks, Kani Kama/Imitation Crab Meat 2 -3 pcs Avocado, sliced ½ inch thick 10 g Sesame Seeds) Optional Mayonnaise TOOLS: Cutting Board Knife Makisu, Sushi Rolling Mat INSTRUCTIONS: (How to spread rice for Inside Out Rolls, Step 3 - 12) Make Sushi Rice (follow this recipe). Wipe the cutting board with a wet towel to moisten. Place half sheet nori horizontally, rough side facing up. Wet your hands. Grab sushi rice, tennis ball size, approximately 200g. Place the sushi rice on the top left corner, shaping it like a potato. Using the bottom part of your left palm, apply pressure, spread the sushi rice horizontally. With your right hand, making a “U” shape, guide the sushi rice so that it covers the top half to 2/3 of the Nori. Rhythmically, turn your left hand three times to cover the top portion of the Nori with rice. Clean your hands with a wet towel, dip your fingers in the water. Using fingertips, apply the pressure, spread the rice to the bottom, from the left, center, and right. Spread the sushi rice all the way to the top and corners to cover the entire sheet of Nori as even as possible. Flip the Nori with Sushi Rice so the Nori is facing up. Place Kani Kama, Avocado in the center of Nori. If you want to add mayonnaise, spread it on Nori first, then place Kani Kama and Avocado. Pick up the bottom edge of the Nori, roll like a Yoga mat. The bottom edge should land below the top edge of Nori. Seal, then roll another 90 degrees forward. Place a plastic wrap on the roll, then Makisu rolling mat. Squeeze the Makisu and remove the plastic. Cut into eight pieces. Plate and serve. (California Roll, Steps 14 - 19) Sing up for our online sushi making class and in-person sushi class in San Francisco. Our sushi kit is available to ship to all 50 US states. For a private and team building event inquiry, send us an email.
- Make Sushi at Home Recipe: Spicy Scallops Temaki (Hand Roll)
COOKING TIME: Total: 35 - 40 minutes Sushi Rice: 30 - 40 minutes Rolling: 1-2 minutes When it comes to consuming raw fish, concerns are natural, especially if you don't have access to fresh fish. The terms "Sushi" and "Sashimi" grade fish can be perplexing, leaving many people unsure about which fish is safe to eat raw. As a sushi instructor, I often receive questions about what makes fish "Sushi Grade." (For a more detailed explanation, check out this entire article.) Let's talk about Scallops. Can you eat them raw? The answer is yes. In fact, most Scallops are safe to consume raw, making them one of the safest seafood options. It's important to note that all raw fish carries a risk of bacteria and potential cross-contamination, but the same applies to other meats like Beef and vegetables. If you're concerned about food poisoning due to cross-contamination, you can take a couple of precautions. One option is to lightly sear the outside of the Scallops in a pan with a dash of Olive Oil (rare is recommended). Alternatively, you can quickly cure them in salt for five to ten minutes. However, for the best experience, I recommend enjoying raw Scallops with just a sprinkle of salt and a squeeze of lemon juice. This simple preparation method allows the Scallops' natural sweetness to shine, which I believe is the ideal way to savor most raw seafood. Now, let's add a twist to elevate the flavors even further. Mayonnaise has a magical ability to enhance the taste of almost any dish. So, why not make our Spicy Scallops Temaki with a kick? When you're purchasing Scallops, look for "Dry Packed" ones, as they have not been treated with Sodium Tripolyphosphate, a preservative used to over hydrate scallops and increase their weight. Here's what you'll need to create this delectable hand roll: INGREDIENTS (for one roll): 30 - 50g Sushi Rice 1 Nori Seaweed, half sheet 40 - 45 g Bay Scallops (Dry packed) 30 g Sriracha 30 g Mayo 5 g Sesame Oil (substitute with Olive Oil) 5 g Masago or Tobiko Fish Egg Optional 1 - 2 pcs Avocado, sliced ½ inch thick TOOLS: Spoon Mixing Bowl INSTRUCTIONS: Make Sushi Rice (follow this recipe). In a bowl, combine Bay Scallops, Mayo, Sriracha and Sesame Oil Hold Half Sheet Nori on the left hand, rough side facing up, placing the thumb on top. Wet your right hand. Grab sushi rice, golf ball size, approximately 30 - 50g. Place the Sushi on the top left corner of Nori. Using your right palm, apply pressure, spread the sushi rice diagonally about 30 degrees. Using a spoon, place Spicy Scallops on the Sushi Rice. Pick up the bottom left corner with the right thumb and index finger, roll it up, diagonally about 70 degrees all the way to the top of Nori. Grab the “thick” rolled part (not the right edge of the Nori), keep rolling clockwise until it is all rolled up. Dip into soy sauce and eat right away before Nori becomes soggy. Roasted sushi nori seaweed For a private and Team Building event inquiry, send us an email.
- How to make sushi at home: Spicy Tuna Roll Hosomaki (Seaweed Out Thin Roll, 6pc)
COOKING TIME Total: 35 - 40 minutes Sushi Rice: 30 - 40 minutes Rolling: 5 minutes If you're a fan of spicy tuna, you're in for a treat with Spicy Tuna Hosomaki. This roll holds a special place in my heart as one of my favorites. The simplicity of the Tekka (Tuna) Seaweed Out Thin Roll is what makes it so perfect. When you think of "rolls" in Japan or sit at a high-end sushi bar, you're likely referring to hosomaki—thin seaweed out rolls that come in six or four pieces. Tekka (Tuna) and Kappa (Cucumber) are among the most iconic and popular hosomaki rolls. Kanpyō, a cooked dried gourd, is another variety, and Kanpyo Maki is one of the few horomaki rolls cut into four pieces. Curiously, I discovered that while six pieces are the standard for hosomaki, Kanpyo Maki is the only roll that comes in four. I asked other sushi chefs about this, but no one seemed to know the reason behind it. So I delved into my own research, only to find that there is no definitive answer. One theory suggests that since Kanpyo is cooked in soy sauce, it can be quite juicy. Cutting it into four pieces helps prevent the juice from running out of the roll. Regardless of the filling—whether it's Tuna, Cucumber, Kanpyo, or Pickles (Oshinko)—hosomaki strikes the perfect balance between the sushi rice and ingredients. Making hosomaki is more challenging than crafting an inside-out roll. It's easy to overfill, requiring careful precision when spreading the sushi rice on the nori. Unevenly distributed rice in hosomaki means the filling won't be centered when cut. Precise cutting is necessary to ensure all six pieces come out evenly. These are the reasons why I adore hosomaki. I encourage you to give it a try. With a bit of practice, you'll understand the magic I'm talking about. TIPS Avoid Overfilling It's tempting to use more sushi rice than necessary. Use less than you think a hosomaki would require. The same principle applies to the filling—less is better. Ensure a Tight Seal Compared to an inside-out roll, you can apply more pressure when making hosomaki. The shape can be either a tunnel or a square. Spreading Rice for Hosomaki For hosomaki, leave the top 1cm (0.5") blank. Leave the left, right, and bottom edges 5mm (1/8") blank. INGREDIENTS (for one hand roll): 100g (½ cup) Sushi rice (follow this recipe) 1 Nori Seaweed, half sheet 20g Spicy Tuna Spicy Tuna (for 4 Hosomaki rolls): 80g (2 - 3 oz.) Sushi Grade Yellowfin Tuna Pieces, Tails or Saku Block 2 -3 pcs Avocado, sliced ½ inch thick 5g (1 tsp) Sesame Seeds 30g (1oz.) Sriracha 30g (1oz.) Mayo 5g (1tsp) Sesame Oil (substitute with Olive Oil) Optional 5g (1tsp) Masago or Tobiko Fish Egg 5g (1tsp) Cilantro, Chopped TOOLS: Cutting Board Knife Makisu, Sushi Rolling Mat Large Spoon Mixing Bowl INSTRUCTIONS: Making Spicy Tuna with Steak Shaped Sushi Grade Tuna The ingredient in this recipe calls for Tuna pieces or Tuna Saku block. However, these are available at Japanese or Asian Supermarkets carrying Sushi Grade Fish. Most retail supermarkets are likely to have sushi grade Tuna in steak shape. If you get steak shaped Sushi Grade Tuna, here are the instructions to make Spicy Tuna. The recipe calls for tuna pieces or tuna saku block, found at Japanese or Asian supermarkets specializing in sushi-grade fish. However, most retail supermarkets typically carry sushi-grade Tuna in steak shape. If you have steak-shaped sushi-grade Tuna, follow these instructions to make spicy tuna. Check the Tuna for any dark spots, which indicate a bloodline. Use a knife to remove them and discard them. With the round "eye" facing up, slice the Tuna into pieces. The middle piece should be a long rectangular shape. The middle piece is usually reserved for nigiri or sashimi, but you can use it for spicy tuna by scraping it with a spoon. Place your thumb behind the spoon and use the edge to scrape the tuna. Scrape along the grain, removing as much white tendon as possible. In a mixing bowl, combine the scraped tuna, sriracha (or any hot sauce), mayonnaise, and sesame oil. Aim for a consistency similar to tuna salad, avoiding excessive moisture that could cause the roll to break apart. Add masago, chopped cilantro, or green onions as desired. Making Hosomaki (The picture is for Tuna Roll with Wasabi) Place the nori with the rough side up. Moisten your hands with water. Take half the amount of sushi rice used for an inside-out roll, approximately 100g. Leave the top ½ inch/1cm blank. Using the bottom part of your left palm, apply pressure to spread the sushi rice horizontally. With your right hand, create a "U" shape to guide the sushi rice, covering the top half to Rhythmically turn your left hand three times to cover the top portion of the nori with rice. Clean your hands with a wet towel and dip your fingers in the water. Using your fingertips, apply pressure to spread the rice, leaving a 1/8 inch/3mm space on the left, suitable, and bottom edges. Lift the nori and place the sushi rolling mat (makisu) underneath. Place the spicy tuna in the center. Roll the hosomaki by picking up the bottom part of the mat and placing the bottom edge against the top end of the sushi rice. Press firmly to seal. Lift the makisu halfway and roll the entire hosomaki forward 90 degrees, so the seam is at the bottom. Seal the roll again using the makisu from the front, top, and backside. Cut the roll into six pieces. Plate and serve. Public Online Sushi Making Class with Sushi kit includes Fresh Fish Sing up for our online Sushi Making Class and in-person sushi class in San Francisco. Our sushi kit has fresh fish and is available for overnight shipping to all 50 US states. For a private and Team Building event inquiry, send us an email.
- How to make sushi at home: Salmon Skin Roll Chumaki (Nori Seaweed Out Roll, 4pc)
Experience a sushi roll's delightful crunch and mild flavor of crispy salmon skin. Fish skin is probably not part of your everyday diet, especially in the US. It can often be perceived as slimy or slippery. However, when appropriately cooked—whether baked or fried—it transforms into something entirely different from the unappealing fish skin you might have imagined. The crunchy texture and mild taste of crispy salmon skin make it an excellent filling for a sushi roll. If you have yet to try a Salmon Skin Roll, prepare for a pleasant surprise. There are a few reasons why salmon skin is a fantastic choice for a filling. Firstly, it contains a lot of fat, adding flavor and richness. Secondly, the area between the skin and the flesh holds a wealth of delicious flavors. TIPS Achieve Extra Crispiness To enhance the salmon skin's texture, I recommend baking or frying it in olive oil until it becomes wonderfully crispy. Use Tuna pieces if available If available, purchase less expensive Tuna pieces or Tuna Tails rather than Tuna Saku blocks which are more expensive. Pair with Pickles or Cucumber While baked salmon skin is not overwhelmingly fishy, it still carries a hint of fish flavor (after all, it's fish skin). It is an excellent choice to combine with pickles, cucumber, or sprouts, mainly due to the skin's natural richness. INGREDIENTS (for one roll) 200g Sushi Rice 1 Nori Seaweed, half sheet 30 g Salmon Skin 15 g Kaiware Sprouts ½ to 1 Cucumber pickles Olive Oil Salt TOOLS Cutting Board Knife Makisu, Sushi Rolling Mat INSTRUCTIONS (How to spread rice on Nori for Chumaki, Steps 5 - 13) 1. Prepare Sushi Rice (follow this recipe). 2. Bake the Salmon Skin at 450°F, sprinkling some olive oil and salt on it, for 10-15 minutes or until it turns crispy. 3. Moisten the cutting board by wiping it with a wet towel. 4. Place the half sheet of nori horizontally on the cutting board with the rough side facing up. 5. Wet your hands. 6. Take half the amount of sushi rice used for an inside-out roll, approximately 200g. 7. Leave the top 1/8 inch/3mm of the nori sheet blank. 8. Apply pressure to spread the sushi rice horizontally using the bottom of your left palm. 9. With your right hand, create a "U" shape to guide the sushi rice, covering the top half to 2/3 of the nori. 10. Rhythmically turn your left hand three times to cover the top portion of the nori with rice, leaving ½ inch/1cm of space on the left side blank. 11. Clean your hands with the wet towel, and dip your fingers in water. 12. Using your fingertips, apply pressure to spread the rice, leaving the suitable ½ inch/1cm and the bottom edge blank. 13. Rotate the nori 90 degrees counterclockwise. 14. Place the filling below the center of the nori. 15. Pick up the bottom edge of the nori and roll it from the bottom up. 16. Seal the roll tightly with your fingers, place the makisu (sushi rolling mat) around it, and further seal the roll. 17. Cut the roll into four equally sized pieces. 18. Plate and serve. (How to make Salmon Skin Chumaki, Steps 15 - 18) (How to make Salmon Skin Chumaki, Steps 15 - 18) Sing up for our online sushi making class and in-person sushi class in San Francisco. Our sushi kit is available to ship to all 50 US states. For a private and team building event inquiry, send us an email.
- How To Spread Sushi Rice on Nori Seaweed for Three Different Types of Sushi Rolls
Sushi-making is an art form that offers a delightful array of sushi rolls to satisfy any palate. This guide will explore the art of spreading sushi rice onto nori seaweed for three different sushi rolls: Inside Out Roll, Hosomaki (Thin Roll), and Chumaki (Medium Roll). Inside out roll Inside out roll means sushi rice out roll. Traditionally, Japanese rolls are Nori outside, rice inside, which is why rice out roll is called inside out roll. It is said that the inside out roll was invented in Los Angeles after California Roll was invented. Though it is an American invention, outside of Japan, inside out roll is considered to be more standard (or popular) sushi rolls. Inside Out Roll - The Classic Reimagined The Inside Out Roll, known as the Rice Out Roll, is a modern twist on traditional Japanese rolls. While the origins of this American invention remain uncertain, it has become a popular choice both within and outside Japan. How to spread rice on Nori for Inside Out Roll: 1. Wipe the cutting board with a damp towel to moisten the surface. 2. Place a half sheet of nori horizontally, rough side facing up. 3. Wet your hands to prevent the rice from sticking. 4. Place a tennis ball-sized portion (approximately 200g) of sushi rice on the top left corner of the nori, shaping it like a potato. 5. Apply gentle pressure to spread the sushi rice horizontally using the bottom part of your left palm. 6. create a "U" shape with your right hand, guiding the sushi rice to cover the top half to 2/3 of the nori. 7. Rhythmically turn your left hand three times to ensure the top portion of the nori is evenly covered with rice. 8. Clean your hands with a damp towel and dip your fingers in water. 9. Use only your fingertips to apply gentle pressure while spreading the rice to the bottom, from the left, center, and right, until it evenly covers the entire sheet of nori. Tips Keep your hands wet all the time Use your towel to clean, moisten your hands Use only your fingertips when touching the rice Hosomaki / Thin Roll Hosomaki, meaning "thin roll" in Japanese, is a traditional sushi roll that demands precision and attention to detail. Popular options include Tekka (Tuna Roll), Kappa (Cucumber Roll), and Kanpyo (Dried Gourd Strips) How to spread rice on Nori for Hosomaki 1. Begin with a damp cutting board. 2. Place a half sheet of nori horizontally, rough side facing up. 3. Wet your hands to facilitate the rice-spreading process. 4. Take half the amount of rice used in an Inside Out Roll, approximately 100g, and position it on the top left corner of the nori, leaving the top ½ inch (1cm) blank. 5. Use the bottom of your left palm to apply pressure and spread the sushi rice horizontally, covering the top half to 2/3 of the nori. 6. Rhythmically turn your left hand three times, ensuring the top portion of the nori is evenly coated with rice. 7. Clean your hands with a damp towel and dip your fingers in water. 8. Use your fingertips to gently spread the rice, leaving approximately 1/8 inch (3mm) of space on the left, right, and bottom edges. Chumaki / Medium Roll Chumaki, translated as "medium roll" in Japanese, allows for generous ingredients. From vegetables like spinach and shiitake mushrooms to Kanpyo and egg, the filling options are diverse. How to spread rice on Nori for Chumaki 1. Prepare a damp cutting board. 2. Place a half sheet of nori horizontally, rough side facing up. 3. Wet your hands to facilitate the rice-spreading process. 4. Take half the amount of rice used in an Inside Out Roll, approximately 200g, and position it on the top left corner of the nori, leaving the top 1/8 inch (3mm) blank. 5. Use the bottom of your left palm to apply pressure and spread the sushi rice horizontally, covering the top half to 2/3 of the nori, leaving the top 1/2 inch (1cm) blank. 6. Rhythmically turn your left hand three times to ensure the top portion of the nori is evenly coated with rice while leaving the top 1/2 inch (1cm) blank. 7. Clean your hands with a damp towel and dip your fingers in water. 8. Use your fingertips to gently spread the rice, leaving approximately 1/8 inch (3mm) of space on the left and bottom edges. Sing up for our online sushi making class and in-person sushi class in San Francisco. Our sushi kit is available to ship to all 50 US states. For a private and team building event inquiry, send us an email.
- Make Sushi at Home Recipe: Crunchy Roll (Shrimp Tempura Inside)
COOKING TIME Total: 50 - 60 minutes Sushi Rice: 30 - 40 minutes Prep (Tempura Flakes): 10 - 15 minutes Shrimp Tempura: 20 - 30 min. Rolling: 5 minutes It's hard to resist the delectable taste of a sushi roll with Shrimp Tempura inside. Here's a twist: how about adding Tempura Flakes and drizzling some Eel sauce (Teriyaki Sauce) over it? The result is a crunchy exterior and an explosion of shrimp goodness inside. Simply delicious! Tempura Flakes, or Tenkasu, are widely used in Japanese cuisine. One popular application is as a topping for Udon or Soba Noodles. Add them to rice dishes, tofu, miso soup, or any other dish that craves extra crunch and flavor. I don't know who first came up with the idea of adding Tempura Flakes to sushi rolls, but whoever it was, it was a stroke of genius. Making Tempura Flakes is simple: drop some tempura batter into hot frying oil. They take about 30 seconds to cook. You can earn extra and store them in the freezer for future use. No worries if you don't have Shrimp Tempura to put inside the roll! Just coat the outside of any Inside Out Roll with Tempura Flakes, and you've got yourself a Crunchy Roll. While I have yet to experiment with many other roll variations, Crabmeat and Avocado (California Roll) are excellent substitutes for Shrimp Tempura. Plain Shrimp or Spicy Shrimp are also great alternatives, and let's remember the mouthwatering Spicy Tuna Crunchy Roll. For vegetarians, a Cucumber Avocado Crunchy Roll is an excellent choice. INGREDIENTS (for one roll): 200g (1 cup) Sushi Rice (follow this recipe) 1 Nori Seaweed, half sheet 5 - 7g (1/4 oz) Sesame Seeds, Roasted (white or black) 2pcs Shrimp Tempura (follow this recipe) 2pcs ¼ Avocado slices 1 Green Leaf Lettuce 5g (1tbls) Spicy Mayo (Sriracha Mayo) 60g Flour 200 ml. (1cup) Rice Bran Oil (or vegetable oil) Eel or Teriyaki Sauce (follow this recipe) TOOLS: Cutting Board Knife Makisu, Sushi Rolling Mat Pot Small Sheet pans Paper Towel Tempura (or Mesh) strainer Chopsticks (or spoon) INSTRUCTIONS: Making Tempura Flakes Prepare Tempura Batter by mixing Flour with an equal amount of water. Heat the frying oil to 190C/375F. You can test the oil's readiness by dropping some tempura batter. The oil is ready if the batter hits the bottom and rises to the surface immediately. Drop small amounts of tempura batter into the oil using a pair of chopsticks (or a small spoon). Let the batter cook for 20 - 30 seconds until it turns golden. Remove the flakes from the oil and let them sit on a paper towel to remove excess fat. Making a Shrimp Tempura Roll (inside out) (How to spread rice for Inside Out Rolls, Step 1 - 6) Place the Nori, shiny side down. Moisten your hands with water. Take a tennis-ball-sized amount of sushi rice. Cover the entire surface of the Nori with rice, starting from the top left corner and moving down to the bottom. Sprinkle the sesame seeds over the rice. Flip the Nori over so the rice faces up and the Nori side is down. Place two pieces of Shrimp Tempura and Avocado slices in the center. Roll the Nori from the bottom up, using a Makisu Bamboo Mat to seal the roll. Place plastic wrap on the cutting board. Spread the tempura flakes evenly on the plastic wrap. Pick up the roll, turn the top side down, and place it over the tempura flakes. Wrap the roll with plastic wrap, ensuring the tempura flakes cover the rice. Roll the roll so the top part with the tempura flakes faces up. Keep the plastic wrap on and place the Makisu on top. Squeeze tightly to ensure the tempura flakes adhere to the rice. Cut the roll into 8 pieces while the plastic wrap is still on (this helps prevent the tempura flakes from falling off). Plate the pieces and drizzle Eel Sauce (or teriyaki sauce) over the top. Enjoy the delightful Crunchy Roll, where the crispy texture of the tempura flakes perfectly complements the succulent shrimp tempura inside. (Making Crunchy Roll, Steps 7 - 16) Public Online Sushi Making Class with Sushi kit includes Fresh Fish Sing up for our online Sushi Making Class and in-person sushi class in San Francisco. Our sushi kit has fresh fish and is available for overnight shipping to all 50 US states. For a private and Team Building event inquiry, send us an email.
- Homemade Recipe for Sushi: California Crunchy Roll 8pc
Looking for a delicious sushi recipe to try at home? Look no further than the California Crunchy Roll. This mouthwatering roll is a delightful fusion of flavors and textures that will satisfy your sushi cravings. Here's how you can make it: COOKING TIME Total: 50 - 60 minutes Sushi Rice: 30 - 40 minutes Prep (Tempura Flakes): 10 - 15 minutes Rolling: 5 minutes The California Roll is undeniably an American creation. It is not a traditional Japanese dish but an invention that originated in Los Angeles (although there are a few different accounts). The Crunchy Roll is an inside-out roll that features tempura flakes on the outside, topped with eel sauce, which sets it apart from "authentic" Japanese sushi like Nigiri. Despite the ongoing debate on whether the Crunchy Roll can be classified as sushi, I must admit I enjoyed it from the first bite. The combination of tempura shrimp inside (recipe here) and the crunchy texture of the tempura flakes outside provided a delightful contrast to other specialty rolls like Rainbow, which typically feature fish on top. Texture plays a significant role in our taste perception, with qualities such as crunchiness, smoothness, mushiness, and runniness adding depth to our culinary experiences. Like many inside-out rolls, the origins of the Crunchy Roll still need to be determined. Interestingly, the California Roll is one of the few sushi creations whose inventor is known, although there are multiple claims to its origin. Regardless, I wholeheartedly endorse adding tempura flakes to your inside-out roll. It imparts a pleasant taste and texture that enhances the overall sushi experience. I encourage you to get creative and experiment with different combinations. Now, let's dive into the recipe for the California Crunchy Roll: INGREDIENTS (for one roll): 200g (1 cup) Sushi Rice (follow this recipe) 1 Nori Seaweed, half sheet 5 - 7g (1/4 oz) Sesame Seeds, Roasted (white or black) 30 g crabmeat or imitation crabmeat (sticks or flakes) 2pcs ¼ Avocado slices 50g Flour 200 ml. (1cup) Rice Bran Oil (or vegetable oil) Eel or Teriyaki Sauce (follow this recipe) TOOLS: Cutting Board Knife Makisu, Sushi Rolling Mat Pot Small Sheet Pans Paper Towel Tempura (or Mesh) strainer Chopsticks (or spoon) INSTRUCTIONS: Making Tempura Flakes 1. Prepare the tempura batter by mixing flour with equal water. 2. Heat the frying oil to 190C/375F. You can test the oil's readiness by dropping a slight tempura batter. The oil is ready if the batter sinks to the bottom and immediately rises to the surface. 3. Drop small amounts of tempura batter into the oil Using a pair of chopsticks or a small spoon. 4. Cook the batter for 20-30 seconds until it turns golden. 5. Remove the flakes from the oil and let them sit on a paper towel to remove excess fat. Making Inside Out California Roll (How to spread rice for Inside Out Rolls, Step 2 - 12) 1. Prepare the sushi rice using this recipe. 2. Moisten the cutting board with a wet towel. 3. Place a half sheet of nori horizontally on the cutting board, with the rough side facing up. 4. Wet your hands. 5. Place a tennis ball-sized sushi rice, approximately 200g, on the top left corner of the nori, shaping it like a potato. 6. Using the bottom of your left palm, apply pressure and spread the sushi rice horizontally. 7. make a "U" shape to guide the sushi rice, covering the top half to two-thirds of the nori with your right hand. 8. Turn your left hand three times rhythmically to cover the top portion of the nori with rice. 9. Clean your hands with a wet towel and dip your fingers in water. 10. Using your fingertips, apply pressure and spread the rice from the left, center, and right to the bottom. 11. Spread the sushi rice evenly, covering the entire nori sheet as uniformly as possible, including the top and corners. 12. Flip the nori with sushi rice so the nori side faces up. 13. Place crab meat and avocado slices in the center of the nori. 14. Lift the bottom edge of the nori and roll it tightly, just like rolling a yoga mat. Ensure that the bottom edge lands below the top edge of the nori. 15. Seal the roll, then roll it another 90 degrees forward. 16. Place a plastic-covered sushi rolling mat (makisu) over the roll and squeeze it gently. Remove the plastic cover. 17. Place plastic wrap on the cutting board and spread the tempura flakes evenly over it. 18. Pick up the roll, turn it upside down, and place it over the tempura flakes. 19. Lift the plastic wrap and wrap the roll with the tempura flakes. 20. Roll the sushi so the top part with the tempura flakes faces up. 21. Keep the plastic wrap on and place the sushi rolling mat over it. Squeeze tightly to ensure the tempura flakes stick to the rice. 22. Cut the roll into eight pieces (cut in half first), keeping the plastic wrap on to prevent the tempura flakes from falling off. 23. Plate the California Crunchy Roll and pour eel sauce (or teriyaki sauce) over it. Now, sit back, relax, and enjoy your delicious homemade California Crunchy Roll! ( Steps 18 - 25) Public Online Sushi Making Class with Sushi kit includes Fresh Fish Sing up for our online Sushi Making Class and in-person sushi class in San Francisco. Our sushi kit has fresh fish and is available for overnight shipping to all 50 US states. For a private and Team Building event inquiry, send us an email.
- Make Sushi at Home Recipe: Dynamite Roll (California Roll with Baked Scallops, Masago and Eel Sauce)
COOKING TIME Total: 35 - 40 minutes Sushi Rice: 30 - 40 minutes Rolling: 5 minutes As you can see from the picture, it's evident that this recipe is not a "traditional" or "authentic" sushi dish from Japan. It's important to acknowledge that this variation deviates from the typical sushi preparation at high-end omakase-only sushi bars. However, it has become a popular menu item at many sushi restaurants in the United States. It was a popular choice at my first sushi restaurant, Sushi on Sunset, in Los Angeles. For this particular recipe, I've used Spicy Scallops. If you're not a fan of spicy flavors, you can simply omit the sriracha. Combining mayo, scallops, and Kani Kama (imitation crab) will still provide a mouthwatering experience. If you're new to making inside-out rolls, you can conveniently purchase a California Roll from your local supermarket or a to-go sushi establishment. Simply make and bake the spicy scallops and place them on the California Roll. Regardless of your chosen method, it's best to enjoy this roll while it's still hot! TIPS Bake Scallops while Cooking Rice: Start cooking the rice first, then prepare and bake the scallops simultaneously. This way, the baked scallops will be ready when your sushi rice is done. No Eel Sauce? Don't worry! If you can't find eel (unagi) sauce, you can easily substitute it with teriyaki sauce. INGREDIENTS (for one roll): California Roll 200g Sushi Rice 1 Nori Seaweed, half sheet 2 Sticks of Kani Kama/Imitation Crab Meat 2-3 slices of Avocado, approximately ½ inch thick 10g Roasted Sesame Seeds Spicy Scallop 60g Bay Scallops (Dry packed) 40g Sriracha 50g Mayo 10g Sesame Oil (substitute with Olive Oil) 10g Masago or Tobiko Fish Eggs 5g Scallions, Chopped TOOLS: Cutting Board Knife Makisu (Sushi Rolling Mat) Mixing Bowl Parchment Paper INSTRUCTIONS: (How to spread rice for Inside Out Rolls, Step 3 - 12) (How to spread rice for Inside Out Rolls, Steps 3-12) (California Roll, Steps 15-20) Prepare Sushi Rice by following this recipe. While the rice is cooking, combine all the ingredients for the spicy scallops in a bowl. On a sheet pan or baking pan, place a sheet of parchment paper and spread the spicy scallop mixture evenly. Drizzle additional mayonnaise on top. Bake at 200°C or 400°F for 10 to 15 minutes. Moisten the cutting board by wiping it with a wet towel. Place the half sheet of nori horizontally on the cutting board with the rough side facing up. Wet your hands and take a tennis ball-sized portion of sushi rice, approximately 200g. Place the sushi rice on the top left corner of the nori sheet, shaping it like a potato. Apply pressure to spread the sushi rice horizontally using the bottom part of your left palm. With your right hand, make a "U" shape and guide the sushi rice to cover the top half to 2/3 of the nori. Using a rhythmic motion, turn your left hand three times to cover the top portion of the nori with rice. Clean your hands with a wet towel and dip your fingers in the water. Apply pressure with your fingertips to spread the rice to the bottom, starting from the left, center, and right. Spread the sushi rice to the top and corners, ensuring the entire nori sheet is evenly covered. Flip the nori with sushi rice so that the nori is facing up. Place Kani Kama and avocado in the center of the nori. If desired, spread mayonnaise on the nori before placing the Kani Kama and avocado. Roll up the sushi like a yoga mat, starting from the bottom edge. The bottom edge should land below the top edge of the nori. Seal the roll and then roll it forward another 90 degrees. Cover the roll with plastic wrap and place the sushi rolling mat on top. Squeeze the mat gently and remove the plastic wrap. Cut the roll into eight pieces. Arrange the California Roll on a plate and place the baked scallops on top. Garnish with chopped scallions, Masago, and eel sauce. Sing up for our online sushi making class and in-person sushi class in San Francisco. Our sushi kit is available to ship to all 50 US states. For a private and team building event inquiry, send us an email.
- Make Sushi at Home Recipe: Avocado Roll
COOKING TIME Total: 35 - 40 minutes Sushi Rice: 30 - 40 minutes Rolling: 5 minutes If you think Avocado is boring compared to fish, please reconsider. Sushi is not solely about raw fish. In Japan, numerous vegetarian and vegan sushi options are available, deeply rooted in tradition. This diversity stems from the historical scarcity of fresh fish in many parts of Japan, particularly in the absence of automobiles over two centuries ago. Consequently, the Japanese have developed a taste for and enjoy non-fish sushi versions. During my private sushi dinners, almost all the children request Avocado Rolls. This simple yet delicious roll is a favorite. I prefer the Hosomaki, a thin roll, as it provides a perfectly sized bite, and the balance between sushi rice and avocado is much more appealing to me than the inside-out roll. TIPS: - Ensure the knife is clean and wet when cutting a roll. - Wipe the knife after each cut. INGREDIENTS (for one roll): 100g (½ cup) Sushi Rice 1 Nori Seaweed, half sheet 2 pieces Avocado, sliced into ½-inch (1cm) thickness TOOLS: Cutting Board Knife Makisu (Sushi Rolling Mat) INSTRUCTIONS: (How to spread rice for Hosomaki, Steps 3 - 12) 1. Prepare Sushi Rice following this recipe. 2. Moisten the cutting board by wiping it with a wet towel. 3. Place the half sheet of nori horizontally on the cutting board, with the rough side facing up. 4. Wet your hands. 5. Place a tennis ball-sized sushi rice, approximately 100g, on the top left corner of the nori sheet, shaping it like a potato. 6. Apply pressure using the bottom of your left palm to spread the sushi rice horizontally. 7. make a "U" shape with your right hand and guide the sushi rice to cover the top half to 2/3 of the nori sheet. 8. Rhythmically turn your left hand three times to cover the top portion of the nori with rice. 9. Clean your hands with a wet towel and dip your fingers in water. 10. Using your fingertips, apply pressure to spread the rice to the bottom, starting from the left, center, and right sides. 11. Spread the sushi rice, leaving a 1cm or 0.5-inch border at the top. Maintain small edges on the nori's left, right, and bottom. 12. Flip the nori with sushi rice so the nori is facing up. 13. Place Kani Kama and Avocado in the center of the nori. If desired, spread mayonnaise on the nori before placing the Kani Kama and Avocado. 14. Pick up the bottom edge of the nori and roll it like a yoga mat, ensuring the bottom edge lands below the top edge. 15. Seal the roll, then roll it another 90 degrees forward. 16. Place plastic wrap on the roll, followed by the Makisu rolling mat. 17. Squeeze the makisu gently and remove the plastic wrap. 18. Cut the roll into eight pieces. 19. Plate and serve. Sing up for our online sushi-making and in-person sushi classes in San Francisco. Our sushi kit is available to ship to all 50 US states. For a private and team-building inquiry, send us an email.
- Matcha Affogato Is The Simplest Yet The Most Crowd-Pleasing Dessert Recipe I Know
While I have mastered the art of making sushi, desserts have always been my Achilles' heel. But I have finally found the simplest yet most crowd-pleasing dessert recipe that never fails to impress: Matcha Affogato. Desserts hold a special place in any meal, and in some cases, they are even more memorable than the main course. Think about a wedding reception dinner: Do you recall the main dish or the dessert more vividly? From my experience, it's often the dessert that leaves a lasting impression. As someone who was never trained in dessert-making, my challenge was to create a dessert that is simple to prepare yet delivers a powerful impact. While mochi ice is always a safe bet, it lacks an element of surprise, and many people have already tried it at Japanese restaurants. The inspiration for Matcha Affogato struck me when I had Affogato at a local Italian pizza restaurant. Affogato consists of gelato or vanilla ice cream with hot espresso poured over it, creating a delightful contrast of hot and cold sensations. To add a Japanese twist to the Italian classic, I decided to substitute espresso with Matcha, which beautifully complements a sushi dinner. It took me some time to find the perfect ice cream to pair with Matcha, and I discovered that Talenti Vanilla Bean Gelato worked wonders in this fusion dessert. How did I know it was the best combination? By observing my guests' reactions. This gelato proved to be a hit, and everyone loved it more than any other ice cream, including organic or locally made varieties. Presentation plays a vital role in enhancing the dessert experience. I ensure the Affogato is as visually appealing as it is delicious. A colorful array of raspberries, mint leaves, and rose petals garnishes the glass. Moreover, using unique and elegant glassware makes a great impression on the guests. Now, let me share the easy-to-follow recipe for Matcha Affogato: Ingredients: - Ceremonial-grade Matcha - Talenti Vanilla Bean Gelato - Raspberries - Mint leaves - Rose petals (for garnish) - Bamboo or electronic whisk Instructions: 1. Place Matcha powder in a bowl. 2. Pour boiling water over the Matcha. 3. Using a bamboo whisk, mix the water until the Matcha powder is completely dissolved. 4. In a glass, add one to two scoops of Talenti Vanilla Bean Gelato. 5. Garnish the gelato with a raspberry and a sprig of mint. 6. Place rose petals underneath the glass for an elegant touch. 7. Pour the prepared Matcha over the gelato just before serving. With this Matcha Affogato recipe, you'll surprise and delight your guests, leaving them with a unique and unforgettable dessert experience. So, the next time you host a sushi dinner, treat your guests to this Japanese-Italian fusion delight!
- How to Make Corporate Team Building Meaningful and Effective
Many businesses face challenges in the current economic downturn as they strive to maintain productivity amid a worldwide pandemic and social distancing measures. The stress and uncertainty can take a toll on employees, decreasing productivity. However, forward-thinking organizations understand the power of practical corporate team-building exercises in revitalizing their workforce. Building strong bonds among co-workers and across different management levels can work wonders for workplace satisfaction, increasing productivity, and staff retention. Even in times of tight budgets and remote work setups, organizing the best corporate team-building events can be a game-changer for your company. Consider the following key points when planning engaging corporate team-building activities: 1) Prioritize Employee Engagement When organizing corporate team-building activities, place your employees at the forefront. With a diverse group of individuals, ensuring everyone feels included is essential. Opt for universally appealing activities such as cooking classes, group philanthropy, and scavenger hunts. 2) Emphasize Teamwork Choose activities that require your team to work together effectively. Problem-solving as a team allows members to appreciate each other's strengths and support each other in areas of weakness. A touch of healthy competition, such as cooking challenges, game marathons, or escape rooms, can add excitement and enhance team problem-solving skills. 3) Encourage Conversation Allocate ample time for socializing and conversation during the team-building event. When team members get to know each other personally, they collaborate more effortlessly. Enhanced camaraderie and friendship among team members contribute to increased productivity. 4) Foster a Casual Atmosphere Creating a casual and relaxed environment is beneficial for corporate team building. Everyday events facilitate the formation of relationships differently. Whether it's a catered learning event or an organized sport, ensure plenty of unstructured time for informal interactions. 5) Emphasize Fun Above all, ensure that the event is enjoyable. The best corporate team-building activities leave participants feeling like they had a fantastic time, connected with their colleagues, and shared some laughs. Ending on a high note instills a sense of accomplishment and camaraderie among team members. Food-related team-building events, in particular, offer a fantastic starting point. Breakthrough Sushi provides some of the most engaging corporate team-building activities centered around sushi-making. Whether you opt for a fun, hands-on sushi-making class or a catered sushi meal as the backdrop to your learning, the experience will encourage employee bonding and increase productivity
- Interview with Paul Johnson, Monterey Fish Market
Paul Johnson is the owner of Monterey Fish Market in Berkeley and San Francisco. Meet Paul Johnson, the visionary owner of Monterey Fish Market in both Berkeley and San Francisco. Born in Rhode Island, where fish played a significant role in the economy, Paul's humble beginnings working out of his truck have now blossomed into a thriving enterprise. Today, Monterey Fish Market supplies sustainable fish to nationally acclaimed restaurants and renowned chefs, including Alice Waters, Michael Minna, Charles Phan, and Judy Rogers. Paul's commitment to sustainability led him to serve as a board member for Monterey Bay Aquarium's Seafood Watch Guide, where he actively contributed to the development of sustainable seafood guidelines and programs. We had the pleasure of sitting down with Paul to discuss his passion for fish, sustainability, and his insights on finding top-quality fish. Q: When did your interest in fish first begin? A: It all started when I worked as a cook and traveled around the US on a motorcycle after school. Settling down in Berkeley, I began working at "In Season," a restaurant close to Chez Panisse, where I got to know Alice Waters. Neither of us was satisfied with our fish supplier's quality, so I started going fishing at Alley on the Wharf. I bought fish directly from the boats and sold them on the floor. Back then, fish quality was not a top priority in the industry. Q: What do you mean by "Old School"? A: In the past, the Chinese and Italian shops would visit Fish Alley in San Francisco to get fish. There was little attention paid to quality and freshness; it was a first-come, first-served approach. However, when I started serving individual customers like Alice Waters, I prioritized delivering exactly what they wanted, even if it meant offering better alternatives when a particular fish wasn't up to par. Q: Did you begin dealing directly with the fishermen? A: Yes, eventually. Currently, about 30% of the fish we obtain comes directly from fishermen or boats. However, seafood is a multi-layered business, and the process is more intricate compared to beef and vegetables. Q: Why is the fish business more complex? A: It's because fish are wild, and the supply and demand are ever-changing. Ocean conditions, weather, and various other factors make it challenging to predict availability, size, and taste of the catch. Q: How did you transition to sustainable fish? A: When we started in 1978, our focus was already on quality. We only bought local fish, which was caught by hook & line from small, local fishermen. We were among the first to adopt sustainable practices, although it wasn't explicitly termed that way at the time. Later on, sustainability gained popularity, but it had always been our standard practice. Q: You also worked on the Seafood Watch Guide, right? A: Yes, I served on the board for five years and continue to maintain a relationship with them. We sell fish to their café at the Aquarium. Q: Your store's name, Monterey Fish, confuses some people. Can you explain its origin? A: The name originated from the fact that we started the business on Monterey Street in Berkeley. Initially, I operated from my car and then rented a small store. Although there's another Monterey Fish store in Monterey, CA, we have no affiliation with them. Q: What are the most frequently asked questions from your customers at the retail store? A: Customers often inquire about when the fish was caught and its age. People need to understand that certain fish, like tuna, need time to mature after being caught for the best flavor. Handling and immediate cleaning are crucial for maintaining fish quality. Q: What should people do to buy good quality fish? A: Trust your fishmonger and build a relationship with a knowledgeable one. Provide feedback on the fish you buy, whether you like it or not, as it helps them understand your preferences better. Monterey Fish Market has set an exemplary standard in sustainable fish and continues to be a reliable source of top-quality seafood. If you're looking for the freshest and finest, look no further than Monterey Fish Market. Monterey Fish Market Wholesale: Pier 33 San Francisco, CA 94111 Tel 415.956.1985 Retail: 1582 Hopkins St. Berkeley, CA 94707 Tel 510.525.5600 #SustainableFish #Interviews #Business #WheretoBuyFish